Linksys Connect Setup Software For Mac 10.11.5
Here’s the steps I took to setup a Linksys Router with Mac OS X. Peel off the sticker on the back of the router. Plug in the router’s power cord. Connect the router to your modem via the supplied Ethernet cord and the port marked ‘Internet’. Connect the router to your Mac via Ethernet.
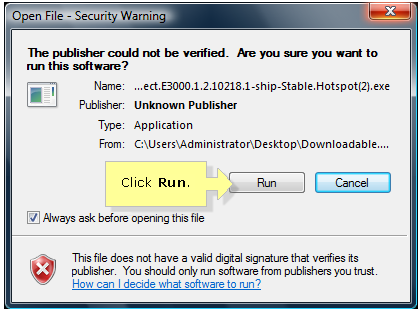
Cisco Connect offers powerful tools for managing your wireless network such as security settings, Guest Access, Parental Controls and Advanced Settings. Cisco Connect is included with every Valet Hotspot.
What's New:
- Added support for E1200v2
- Added support for E4200v2
- Added improvements to firmware and software update checking
- Updated M10 with latest version of Cisco Connect
- Tested with latest E4200 maintenance firmware
- Tested with latest E1500, E1550, and E3200 maintenance release
- Added support for Canada on the E1550
- Added support for E2500 with IPv6
- Added support for Mac OS X 10.7
- Added support for X2000 and X3000
- Added additional setup screens for manual DSL settings
- Added localization for E1200, E1500, E2500, and E3200
- Added support for USB printers on E4200 (Virtual USB)
- Added support for USB storage on E4200
- Added Latin America support for E1200 and E1500
- Added support for USB printers on E3200 (Virtual USB)
- Added support for USB storage on E3200
- Added support for E1550
- Added French Canadian support for E1200, E1500, E2500, and E3200
- Changed FAQ format to HTML instead of PDF
- Added support for E3200
- Added support for AE1000 international release
- Added ability to target software updates to specific Mac OS versions
- Added support for E2500
- Separated documentation into Documentaiton folder and Legal folder
- Added check for firmware update at the beginning of setup
- Added support for E1200 and E1500
- Removed FAQ
- Added TSG
- Updated software signature certificate
- Cisco Connect can now get back in sync if changes were made in the Web GUI
- Added SpeedTest feature
- Improved error messaging for 3rd party wireless issues
- Added E4200 support
- Added automatic log upload
- Users can now configure the router's name and password during setup
- Improved messaging
- Fixed bug to allowed I and O in serial number during setup
- Fixed various RighttoLeft display bugs
- Updated License Notice and DofC documentation
- Added support for the following languages
- German
- Swedish
- Danish
- Norwegian
- Finnish
- Dutch
- Spanish
- Italian
- French
- Portuguese
- Polish
- Turkish
- Thai
- Arabic (on PC only)
- Setup now supports the default open wireless encryption
- Setup will update itself before running if the Internet connection is up
- Added Progress bars
- Supports reinstallation of Cisco Connect
- localized to French Canadian
- addressed HDK issues on Mac
- Improved internet checking
- addressed issues around false negatives on internet check
- added in handling of internet proxies
- fixed broken link to customer support page
- improved setup
- update improvements
- initial release
Popular apps in Network / Wi-Fi Tools
Note: TL-PS110U is used for demonstration in this article.
System Information: Mac OS X EI, Version 10.11.5
Below is a topology of normal network and taken as example in this guidance.
The Default IP of the print server is 192.168.0.10. Before doing the settings, please prepare the IP of the router. Normally, it’s the gateway of your computer.
In this guidance, 192.168.1.1 is assumed as the IP of the router. If your router’s IP is 192.168.0.x (x is between 1~254), you can skip to step 4.
Step 1 Connect your MAC PC to the print server with an Ethernet cable directly. On your MAC PC, click Apple icon and go to System Preferences.
Then click Network.
Step 2 Go to Ethernet, Advanced, select Manually on Configure IPv4 field and set the IP address & Subnet Mask like the following. Click Apply button.
Step 3 Open the Safari and type http://192.168.0.10 in the address bar. Then please go to Setup->TCP/IP page, change the IP to 192.168.1.10 and click Save & Restart button.
The 'Google Chrome Helper' is the interface between the embed code in the browser and a remote server, and it's set to run automatically with Chrome's default settings. Google access helper.
Note: The TL-PS110U is produced without password by default.
Step 4 Connect the printer to Print Server and Print Server to one LAN port of your router. Connect your MAC PC to your router with wire or wireless.
Click Apple icon, go to System Preferences->Network. Click Ethernet and select Configure IPv4 as Using DHCP. Then click Apply button.
Step 5 Click Apple icon, go to System Preferences ->Printer & Scanner.
In the new window, please click “+” to add a printer.
Step 6 Choose IP at the top bar and configure the options as the following:
- Protocol: Line Printer Daemon - LPD
- Address:192.168.1.10 or 192.168.0.10 ( which depends on the IP of printer server)
- Queue: lp1
At last, select the driver of your printer and click Add to finish the process.
If can’t find the driver of your printer, please try Generic PostScript Printer / Generic PCL Laser Printer or Auto Select.
Step 7 Your printer will be displayed in the box. If you want to set it as default printer, please select it as the default printer.
Until now,all the configuration are finished.
Get to know more details of each function and configuration please go toDownload Center to download the manual of your product.